
TOTPRadius : MFA-protected SSH access to Ubuntu servers with LDAP or Azure AD Credentials and hardware or software tokens

SSH, the secure shell, is often used to access remote Linux systems. Because we often use it to connect with computers containing important data, it’s recommended to add another security layer, such as the second factor.
In this guide, we will show how to leverage the TOTPRadius appliance to organize SSH access to your Ubuntu server using local LDAP or Azure AD (Microsoft Entra ID) as the primary authentication factor, and TOTP factor from TOTPRadius as the secondary factor. The secondary authentication factors available with TOTPRadius can be a mobile authentication app or a hardware token.
Requirements
- A computer running Ubuntu 16.04 LTS or above
- A configured SSH connection or console access to the Ubuntu machine
- A fully functional TOTPRadius appliance with available user licenses (the appliance comes with 5 free user licenses)
- A phone running Android or iOS or a hardware token enrolled to TOTPRadius
- Active Directory on-premises or Azure AD (Microsoft Entra ID) configured to be used as the primary authentication method in TOTPRadius
Install and configure PAM Radius for Ubuntu
Login to the Ubuntu machine using an account with administrative privileges. Then, install the module using the command below
$ sudo apt-get install libpam-radius-auth
Open the configuration file and add the RADIUS server configuration
sudo nano /etc/pam_radius_auth.confAdd the server as shown in the example below, where 192.168.1.1 is the IP address of your TOTPRadius appliance and shared_secret should match the RADIUS secret (to be configured in the next chapter)
# server[:port] shared_secret      timeout (s)
192.168.1.1     hwxa30lqwcr             10
Configure the SSH server to use this PAM module as the authentication source. Open the /etc/pam.d/sshd file
sudo nano /etc/pam.d/sshdAnd add the following line
auth sufficient pam_radius_auth.soMake sure this is added just before the following line
@include common-authThe resulting file should start with the lines similar to the shown below
# PAM configuration for the Secure Shell service
auth sufficient pam_radius_auth.so
# Standard Un*x authentication.
@include common-auth
To finalize the configuration on the Ubuntu side, you have to create local users with usernames matching the users in the LDAP or Azure AD (Microsoft Entra ID). Please note that this is a technical restriction of the PAM module. The module can only forward the authentication to TOTPRadius, it is not allowed to create user accounts that do not exist in the system for obvious security reasons. Please note that the password set at this stage can later be removed (alternately, you can generate any random complex password and do not need to record it as it will not be used)
sudo adduser jsmith
Adding user `jsmith' ...
Adding new group `jsmith' (1002) ...
Adding new user `jsmith' (1002) with group `jsmith' ...
Creating home directory `/home/jsmith' ...
Copying files from `/etc/skel' ...
New password: put_any_complex_password
Retype new password: put_any_complex_password
passwd: password updated successfully
Changing the user information for jsmith
Enter the new value, or press ENTER for the default
        Full Name []:
        Room Number []:
        Work Phone []:
        Home Phone []:
        Other []:
Is the information correct? [Y/n] Y
If you want to make sure no authentication with local password is possible (even theoretically), you can specify --disabled-password argument
$ sudo adduser --disabled-password jsmithYou can also pre-add the users from your Azure Directory in bulk using a script similar to below:
sudo adduser --disabled-password --gecos "" user1
sudo adduser --disabled-password --gecos "" user2
sudo adduser --disabled-password --gecos "" user3
...
--gecos GECOS Set the gecos field for the new entry generated. adduser will not ask for finger information if this option is given.
Configure TOTPRadius
 TOTPRadius will be used as the only authentication method for SSH access. Therefore, the SSH login process will require to supply the username and both the primary and secondary authentication factors in the password prompt. The password supplied by the user is expected to contain both the AD or Azure AD (Microsoft Entra ID) password and the 6 digits OTP. The supplied password is parsed and the OTP gets verified locally, and AD password is checked via AD or Azure AD (Microsoft Entra ID) using the RPOC method. Please note that the Azure AD (Microsoft Entra ID) functionality is available with TOTPRadius v0.2.7 or newer.
The guide below will show using on-premises Active Directory as the primary authentication source (LDAP proxy mode) as an example. Azure AD (Microsoft Entra ID) can also be enabled and used similarly.
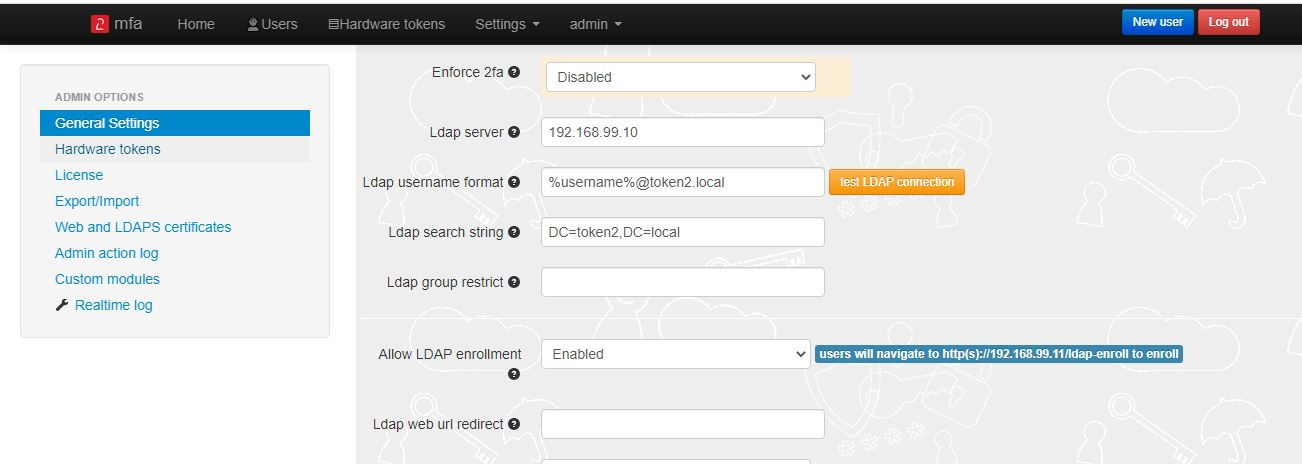
► In Main settings, set the Radius secret to the one used in the PAM configuration above
► In Main settings, set 'Allow initial login' value to zero (having initial login allowance is used for self-enrollment, which is not required in this configuration)
► [optional] In the Endpoint IP and subnet fields specify the parameters of your Ubuntu server
► Set LDAP as enabled
► Specify the LDAP server IP/FQDN and the format of the username (%username%@domain.local or DOMAIN\%username% format, where "DOMAIN" or "domain.local" need to be replaced with the domain name or removed if needed )
► If you decide to allow self-enrollment, make sure "Allow ldap enrollment" parameter is enabled. In the same section, you can also allow re-enrollment and modify the intro text of the LDAP web enrollment page
Generate or set the second factor for the user on the TOTPRadius appliance
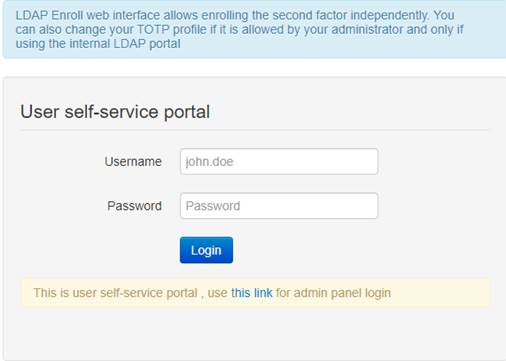
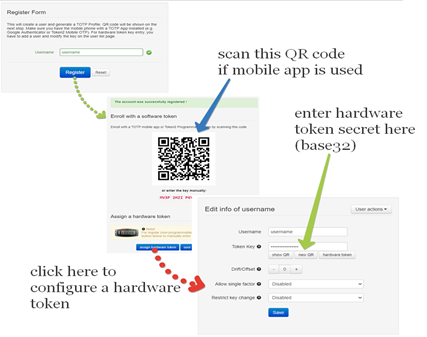
Second factor for the user can be added in two ways:1) By self-enrollment. Users can enroll their hardware tokens themselves using link http://(totpradius server_ip)/ldap-enroll :
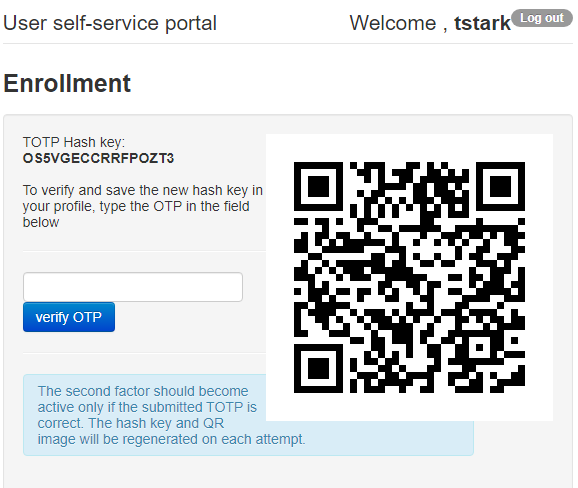
Self Enrollment is possible using any TOTP app (such as Google Authenticator or Microsoft Authenticator). If you wish to use our programmable hardware, you can burn the secret onto the hardware token by scanning the QR code using one of the NFC Burner apps.
2) By TOTPRadius admin. Login to TOTPRadius admin interface, and click on New User:
About
Installation and configuration
- Installation and initial configuration
- Network configuration
- Migrating from older versions
- LDAP Configuration
- Azure AD Configuration
- Self-service enrollment portal
- Web and LDAPS Certificates
- Syslog configuration
- Single-factor authentication exceptions
- Slave appliance mode
- Dynamic RADIUS Attributes
Integration guides
Blog
04-04-2026
Understanding FIDO User Verification Modes and the always_uv Setting
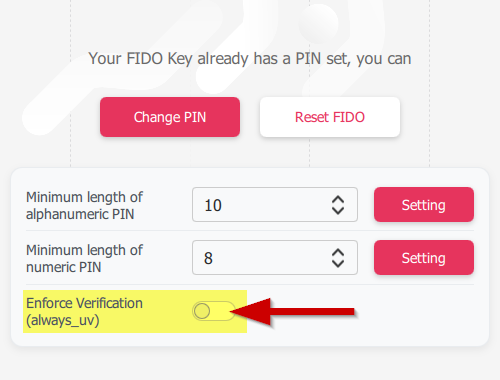 Token2 R3.3 and later FIDO2 keys enforce user verification by default with always_uv = true, improving security, though some platforms and apps like Windows 10, macOS, and certain legacy clients may fail to handle this override correctly.
05-03-2026
Introducing TOTPVault — self-hosted TOTP management for teams
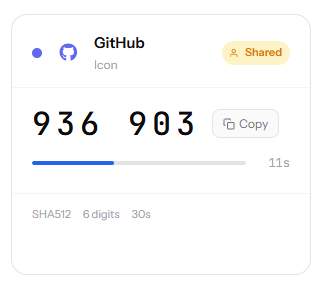 Most TOTP apps work by distributing copies of the secret to every person who needs access — fine for personal accounts, but for shared service accounts it means MFA secrets scattered across people's phones with no clean way to revoke access when someone leaves.
21-12-2025
Android, NFC, and the Missing Piece of WebAuthn
 For years, Android users have faced a frustrating limitation—Android does not support CTAP2 over NFC. This means no PIN verification and no discoverable credentials (passkeys) when using NFC, and therefore limited to simple U2F-style flows without user verification. That said, there finally seems to be a solution.